Tutorial: Staggered Gatefold Card
Here is a wonderful fun-fold card that my teammate Arvon taught us how to make at a recent Zoom Stamping session. Don’t be intimidated by the number of pieces – it’s actually pretty straightforward to assemble!
You will need the following cuts of cardstock and Designer Series Paper:
Cardstock Colour #1:
5 ½ x 4 ¼”
4 ¼ x 3 ¾” – score along long side at 1″
4 ½ x 2 ½” – score along the short side at 1″
Cardstock Colour #2:
5 ¼ x 4”
4 x 2 ½”
2 ¼ x 3 ¼”
Designer Series Paper:
5 x 3 ¾”
3 ¾ x 2 ¼”
3 x 2”
7/8 x 2 ½”
White or Vanilla Cardstock:
4 x 2 ½”
2 ¼ x 3 ¼”
You will also need about 15″ of ribbon, and additional pieces of white and coloured cardstock to punch out some circles.
Use the photo below as a guide when choosing your colours and your DSP orientation. Do not attach anything yet.

I’ll be referring to these three panels as Panel A, B, and C throughout the tutorial. Panel A is the biggest, then B, then C. We’re going to start by assembling Panel B.

Attach your DSP to the cardstock mat, and then to the panel as shown – to the right of the scoreline.

Flip the panel over, and attach the white cardstock and small piece of DSP as shown. This is where you’ll write your message when the card is finished.

Set Panel B aside. We are next going to assemble Panel C. Start by stamping a sentiment and/or image on this other piece of white cardstock.

Attach the DSP to the cardstock mat layer, but do not attach it to the scored layer of cardstock yet. Set these pieces aside for now.

Moving on to Panel A, do the same thing – attach the DSP to the mat layer, but not to the cardbase.

Now we can start to assemble the three panels together. Attach your completed Panel B to your Panel A cardstock piece, as shown below.

Next, attach Panel C as shown below. Add your stamped white cardstock as shown.

You can now add your DSP to Panel A, which will cover the ‘seams’ of Panels B & C.

Next, it’s time to add ribbon. Wrap your ribbon around the full card, as shown below, with both ends laying to the left side.

Attach your cardstock and DSP to Panel C. This will cover the ribbon and help hold it in place.

If you like, attach a glue dot to the back right of the card to hold the ribbon in place and make it easy to tie closed.

Here’s how it looks from the front.

Now time for a little decorating! Punch two white circles and stamp them as desired.

Attach the larger one to the outside of Panel B, as shown.

The smaller circle goes on the inside of the card.

When Panel B is closed, the circle covers the inside circle!

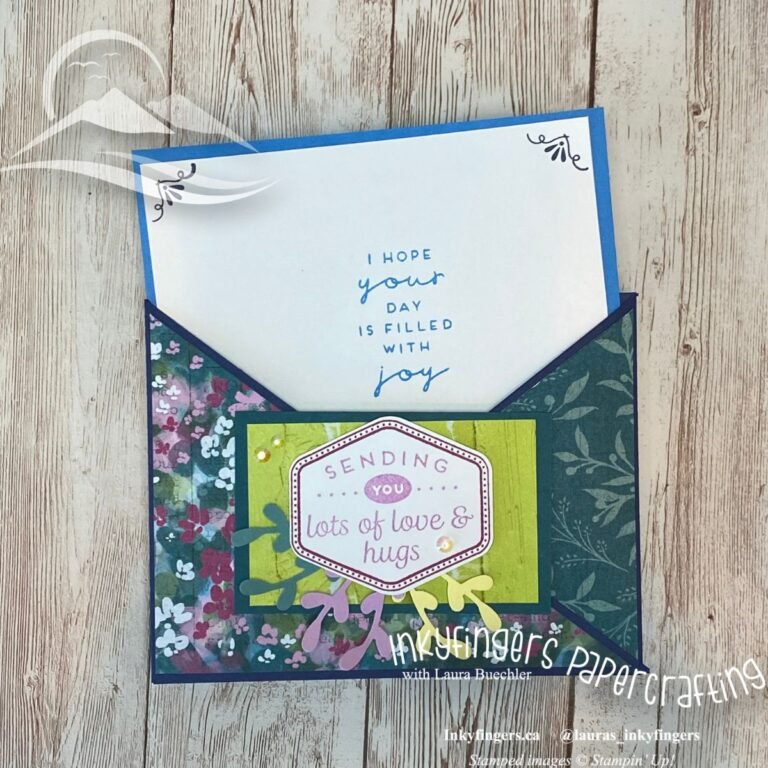
Here’s the finished card when closed:

And when fully open:

Once you’ve made your own card with this fold, come and share a photo with me on my Facebook page! I love to see your creations!
Happy Stampin’!

")
 Designer Series Paper")


 Circle Punch")
 Circle Punch")
 Circle Punch")
 Open Weave Ribbon")
")

Thank you for sharing! This looks like fun!
Thank you. The instructions are very clear. Beautiful fun fold