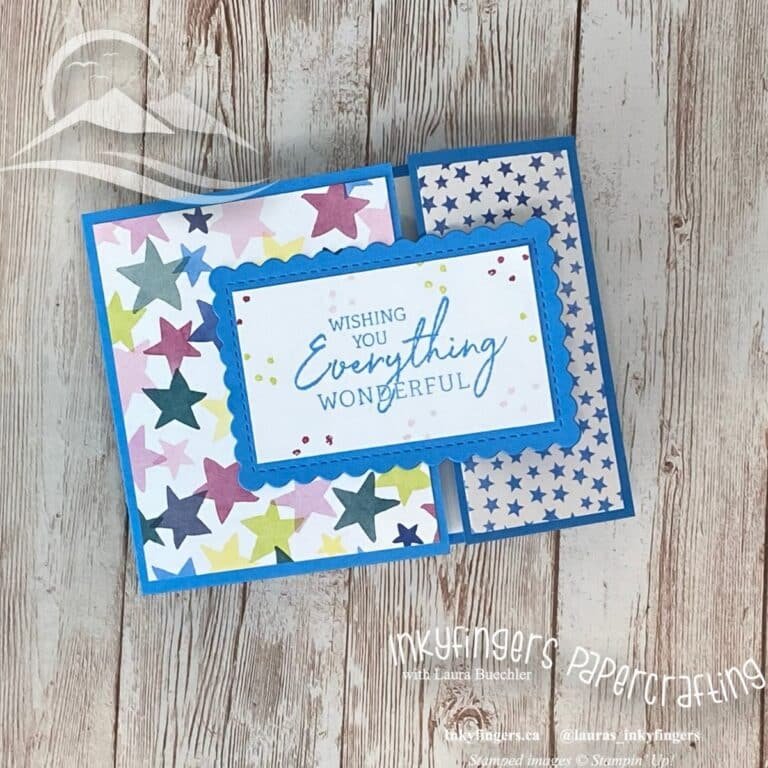
Posts Tagged ‘beginners’
- In: beginners | the crafty life | tutorial | video
- Leave a Comment
This week’s video is an introduction to Stampin’ Up! products: what makes them different, why I love them, and how to use them. This is the usual spiel I give at my workshops or home parties when I have brand new stampers in attendance!
If your device/browser doesn’t allow videos, click here to watch on my YouTube channel. Don’t forget to like and subscribe while you are there!
Now that you’ve had an introduction to Stampin’ Up! products, head over to my events page and sign up for a workshop – or, book your own home party and invite all your friends!
Happy Stampin’!
Product List
Please visit my 24/7 online store by clicking above, or contact me: lauralyzer@gmail.com.
Have you subscribed to my monthly newsletter? You’ll receive project tutorials and inspiration, as well as all workshop dates and special promotion news. Don’t miss out, sign up today!
Tutorial: Bird Ballad Snip & Fold
Posted June 18, 2019
on:- In: beginners | Birthday | the crafty life | tutorial
- Leave a Comment
A few weeks ago, I received this card in a swap from another demonstrator, Tanya Sousa. I had seen this fold on Pinterest, etc. but wasn’t too fussed about it … then I saw it in person and immediately fell in love (of course, it doesn’t hurt that Tanya used one of my favourite new DSPs, Bird Ballad!) One of the cool things about this layout is that it gives you a really easy way to show both sides of the gorgeous paper. Here’s how to make it!
Cut your DSP to card front size (4 x 5.25″).
Line it up in your trimmer at 2-5/8″. Cut from 1-1/2″ to the edge.
Fold back both sides and crease with your bone folder.
Decorate your card as desired.
How simple is that?!
Have you made any projects with this fold? Share them in the comments below! I love to see your creations!
Happy Stampin’!
Product List
Please visit my 24/7 online store by clicking above, or contact me: lauralyzer@gmail.com.
Have you subscribed to my monthly newsletter? You’ll receive project tutorials and inspiration, as well as all workshop dates and special promotion news. Don’t miss out, sign up today!
Stampin’ Up! Glossary
Posted March 26, 2019
on:Have you ever noticed how much lingo we crafters throw around while we’re teaching and creating? I hadn’t really thought about it until recently, when I did a home party for a brand new hostess and five of her friends. While many of them had used other papercrafting products before, this was their first experience with Stampin’ Up!, and I realized that there are so many terms (including acronyms) that I use without even thinking, that might not be clear to someone who’s new to SU. Even with more experienced stampers, I witness interactions like the below quite often:
Crafter 1: Can you please pass the (name of item)?
Crafter 2: **blank stare**
Crafter 3 **passes two or three random items hoping to get lucky**
Me: You mean this? **holds up item**
Crafter 1: THANK YOU!
Sometimes this is because Crafter 1 called the item by the wrong name, and other times it’s because she called it by the right name but Crafters 2 and 3 didn’t recognize the lingo. Either way, it can be frustrating for all! Hopefully, this handy glossary will help!

Inkpads

Stamp Set*

Block

Stamp*

Stampin’ Scrub
Designer Series Paper (“DSP”)

Cardstock
Alright, those are the basic items you’ll run into at a crafting workshop. Here are a few more terms you’ll want to know!
Types of Stamps
There are now four types of stamps available from Stampin’ Up.
1. Wood-mount stamps
Wood-mount stamps are made of red rubber and come with a wooden block for you to permanently mount the stamp onto. Stampin’ Up! is phasing out wood-mount stamps; soon, they will only be available for large background stamps as shown above.
2. Clear-mount stamps
Clear-mount stamps are made of red rubber and do not come with blocks; you must purchase separately the acrylic blocks to use with your stamps. Clear-mount stamps can be used with acrylic blocks and then removed to store in their cases, so they take up much less room than wood-mount stamps.
3. Photopolymer stamps
Photopolymer stamps are see-through, allowing you to see exactly where you are stamping. Photopolymer stamps are also to be used with acrylic blocks, purchased separately.
4. Cling stamps
Cling stamps are made of red rubber and do not come with blocks; you must purchase separately the acrylic blocks to use with your stamps. The stamps themselves are very similar to clear-mount stamps, but the labels have been reformulated to be significantly more sticky, thanks to feedback received from demonstrators and customers. Cling stamps will soon replace clear-mount stamps.
NOTE that Stampin’ Up! determines what type of stamp material in which to manufacture each stamp set. The catalogue and online listing for the stamp set will specify which format(s) it is available in; be sure to pay attention and choose the correct format so you are happy with your purchase!
Other Terminology:
SAB = Sale-a-Bration
This is the annual promotion that takes place between January and March every year. During this time, Stampin’ Up! offers exclusive items that can be earned FREE with purchase. These items are not sold separately and can only be earned with purchase during the promotional period.
CASE = Copy and Share Everything (or, Copy and Selectively Edit)
CASE’ing is a great way to find (and share!) inspiration. Here’s a great example of a card I received and then CASE’d:
– card I received
– my CASE’d version
To learn more about CASE’ing, check out my blog post on the topic!
Bundles
Bundles include a stamp set and either a co-ordinating punch or thinlit set. These items are also available separately, but when they are purchased together, you save 10% off the purchase price. Pay attention, though; bundle pricing is only in effect for the catalogue period in which the bundle was introduced. For example, for the Happy Tails bundle above, while the stamp set and punch may carry over to the next catalogue, they will only be available for purchase separately, not as a bundle, and thus full price will apply. Short version: If you love the bundle, buy it before the catalogue expiration date!
Kits
Kits are an all-inclusive way to get crafting fast! Great for beginners or those who want to take crafting on-the-go, they contain everything you need to complete a project.
Card kits (like the “Soft Sayings” card kit shown above) include stamp set, block, pre-printed card bases and envelopes, die-cut accents and embellishments, a stampin’ spot (mini inkpad), and dimensionals – enough to make 20 cards. The projects are pre-designed for you, so you can get to the fun part of crafting right away – and of course, you can always adjust the designs to suit your own taste!
You Can Make It kits (like the “Flowering Desert” kit shown above) include a stamp set, a block, cardstock, and ink. Sometimes other elements, such as colouring tools or embellishments, are also included. In this case you will be designing the projects yourself.
Paper Pumpkin kits include everything you need to complete a mystery craft project – that’s right, you won’t know what it is until you open the box! Paper Pumpkin is a subscription service, and you can try it out for one month, or subscribe for 3, 6, or 12 months. (You can also give a subscription as a gift!) The contents are different every month, but you’ll always find everything you need to create the project in the red box, which is delivered right to your door.
Do you have questions about crafting terms that isn’t covered above? Drop me a comment and I’ll add it to the post! Thanks for reading and happy stampin’!
Please visit my 24/7 online store by clicking above, or contact me: lauralyzer@gmail.com.
Have you subscribed to my monthly newsletter? You’ll receive project tutorials and inspiration, as well as all workshop dates and special promotion news. Don’t miss out, sign up today!
If you’re just starting out with stamping, it may seem overwhelming to look through the 240-page annual catalogue and figure out what to buy. Here are my top recommendations to get your craft space outfitted – without breaking the bank!
1. Bone Folder
This was the very first tool I was given as a new papercrafter, and it really is an absolute necessity. Every card you make is going to need at least one fold, and the bone folder makes it crisp and flat.
2. Trimmer
I made do with a Fiskars trimmer I bought from SuperStore for quite a while, but when I finally bought my Stampin’ Up! trimmer, I wondered why I’d EVER put it off for so long! With a fold-out arm that allows you to measure and cut paper as large as 12×12″, and two repositionable blades for scoring and cutting, this trimmer makes it easy to create projects from simple to stunning.
Once you start stamping, you’ll need a way to clean your stamps. Read this post to learn the best method, then get yourself a Stampin’ Scrub and a bottle of Stampin’ Mist to go with it.
Bundling the whole set together will save you 10%, but when you’re starting out, it may make more sense to buy one or two blocks at a time to keep your investment affordable. Every stamp listing in the catalogue will include information on what blocks are recommended for use with the stamp set (see this post for more information).
5. A Stamp and Punch Bundle
We’re halfway through the list and we’re finally getting to the fun stuff! You may not have a Big Shot yet, but there are plenty of fun stamp and punch bundles that will have you creating perfectly co-ordinated projects quickly and easily. But how do you know which bundle to choose? Well, you’ll want something versatile, that can be used for a variety of projects and occasions; and something with a good combination of images and sentiments. And of course, you’ll want to pick sets that appeal to your personal taste! Here are some sets that fit the criteria:
6. A Standalone Stamp Set
For beginners, I look for stamp sets that have a lot of bang for your buck – this means large stamps (so you can complete a project quickly and easily), and, as above, versatility. Here are some that fit the bill:
7. Designer Series Paper and Cardstock
Here’s where personal preference really starts to affect your choices. Some colour combinations will excite and inspire you, while others will leave you feeling “meh” … and my preferences might be totally different from yours! Page through the Designer Series Paper section of the catalogue and see which papers draw your eye again and again. The heart wants what it wants, and when you choose a product you love, you’ll love creating with it! Don’t forget to include a pack of co-ordinated cardstock with it as well – and a pack of white cardstock, for your card inserts.’
8. Inkpads
Use the above DSP and cardstock as a jumping-off point; now that you know which papers appeal to you most, review the list of co-ordinating colours and choose one or two of your favourites to add to your collection. If you’re feeling spendy, choose a whole inkpad family bundle to save 10%. Oh, and grab a black inkpad while you’re at it, because everyone needs one of those!
9. Blender Pens
As I mentioned in this post, blender pens can resolve a host of beginner mistakes – and they are also a very economical stand-in for the entire family of beautiful markers! Just dip them in any colour of inkpad, and use them like a paintbrush to add detail or cover up a mis-stamp.
10. Adhesive
Now that you’ve created something wonderful, you’ll need to hold it all together! There are lots of options, depending on what kind of projects you’re creating – Stampin’ Up!’s Snail is the basic double-sided tape that you’re probably already familiar with.
Got another suggestion for a must-have tool? Comment and let me know!
Please visit my 24/7 online store by clicking above, or contact me: lauralyzer@gmail.com.
Have you subscribed to my monthly newsletter? You’ll receive project tutorials and inspiration, as well as all workshop dates and special promotion news. Don’t miss out, sign up today!